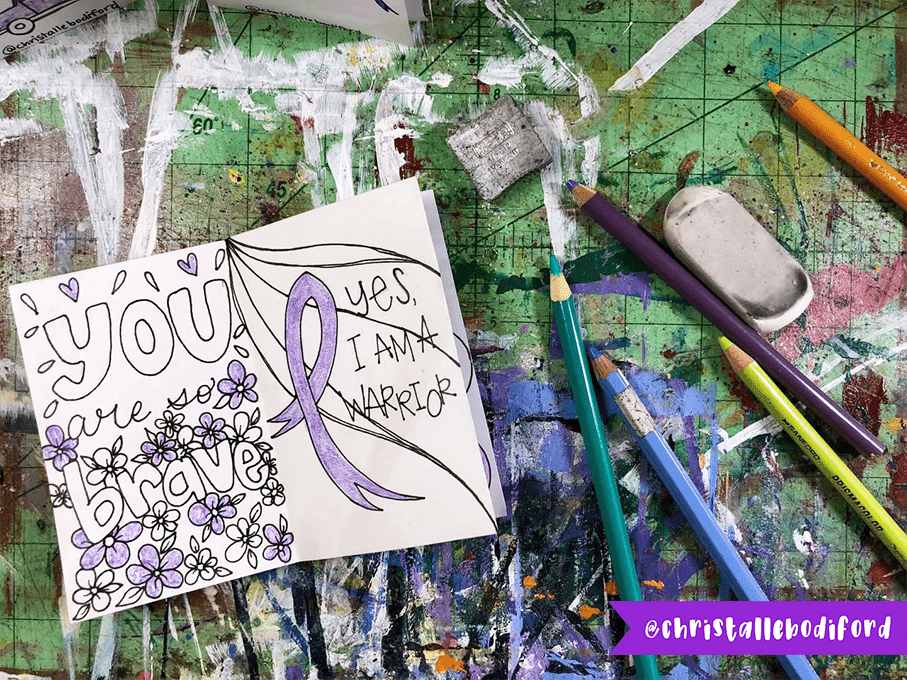
I think we can all agree that no matter whether you enjoy spreading epilepsy awareness via virtual or physical methods, it can sometimes be a challenge to come up with an eye-catching awareness campaign idea.
I want to share with you an easy and affordable way to get creative and spread awareness, using limited materials, for people of any age or ability. And the best part? No digital components are required! If you aren’t a “techie person,” no worries! I’ve got your back!
1) What Is A Zine?
According to Wikipedia, “A zine is a small-circulation self-published work of original or appropriated texts and images, usually reproduced via a copy machine. Zines are the product of either a single person or of a very small group, and are popularly photocopied into physical prints for circulation.”
Let’s simplify that definition a little bit, shall we? A zine is a self-made magazine, using text or images, created by one or more people.. A zine is typically circulated throughout a community via physical distribution. But, it’s important to note that a zine can also be digitally created and distributed.
2) What Do You Need?
So what does it take to make a zine? Not much! In fact, you probably have everything you need within your home. If you don’t, I’m sure you have a neighbor or friend that would love to help you complete this fun project! So let’s jump into the supply list.
You will need the following supplies for this creative project.
- Paper
- Letter Size: 8.5” x 11”
- Regular ‘ol printer paper will work just fine. You do not want to use paper that is too thick, or you will not be able to fold your zine properly. A lightweight paper works best.
- You will need one piece of paper per zine.
- Pencil
- Scissors
- Markers, Pens, Crayons, or Colored Pencils
- Be as creative as you want and use as many colors as you’d like. This is YOUR zine, and you can create whatever your little heart desires!!
- Washi Tape (optional)
- I stick a piece of washi tape on my zines to keep them closed. This is completely optional and not necessary. Once you’ve folded your zine, it should stay in place without taping.
3) Select a Topic
OK, there is one more thing you’ll need before creating your zine that can’t be purchased, and that is YOUR message! It’s great to make a zine, but what’s the message you want to convey to the people reading your zine?
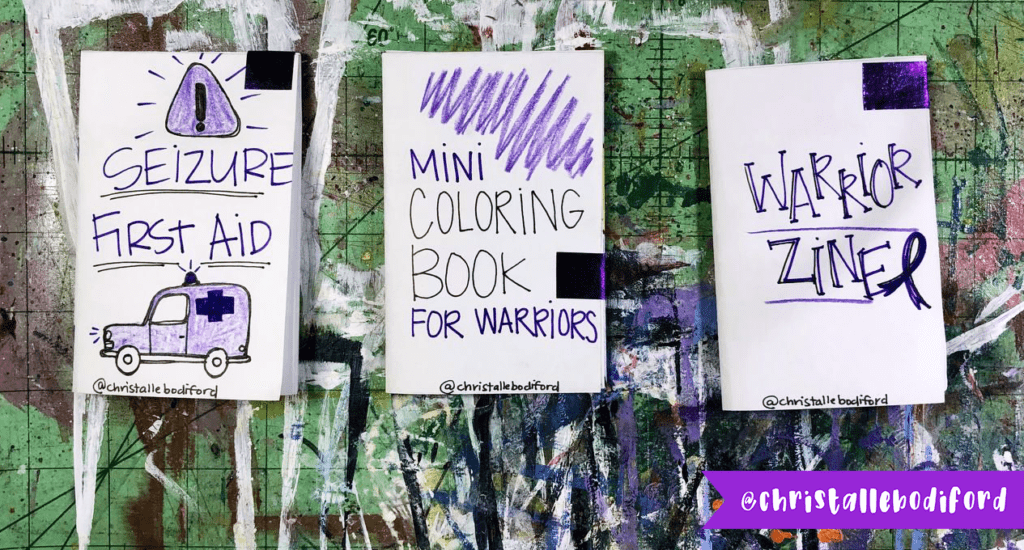
Can’t think of a message? No worries! I’ve come up with three message ideas that I’ll be sharing with you today.
Zine Message Ideas:
- Warrior Zine – (Encouragement) Comforting message for the epilepsy community
- Seizure First Aid – (Awareness) Seizure first aid instructions for educational purposes
- Mini Coloring Book For Warriors – (Self-care) Motivational illustrations to color as needed
4) Set Up Your Pages
The most difficult part about creating your epilepsy zine will be folding the paper in the proper way to ensure your layout is correct. Don’t worry, I’m going to walk you through each step and break it down so it’s easy to follow.

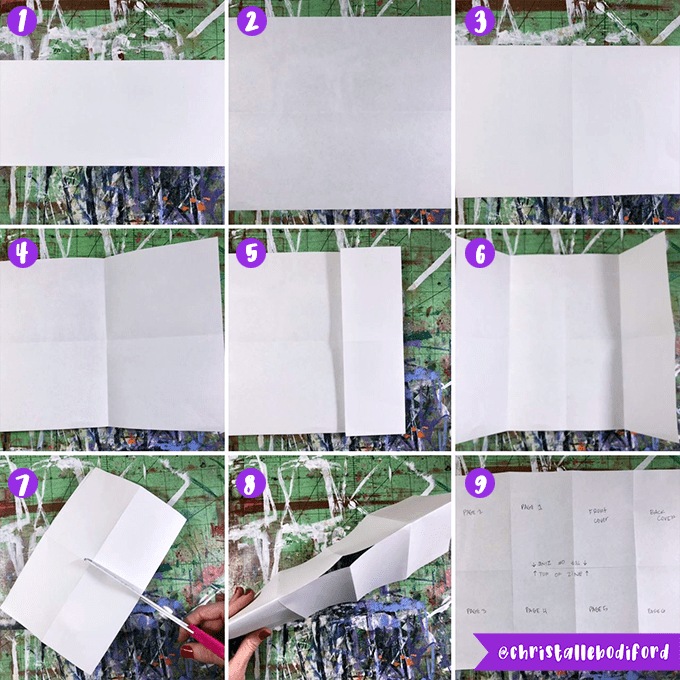
Step 1: Beginning with your paper in landscape layout, fold your paper in half.
Step 2: Open your paper.
Step 3: With your paper in portrait layout, fold your paper in half again.
Step 4: Open your paper.
As visible in the Step 4 photo above, you should now have two fold lines and four equal rectangles on your paper.
Step 5: Fold the right side of your paper to the center fold line. Repeat with the left side of your paper.
Step 6: Open your paper.
As visible in the Step 6 photo above, you should now have four fold lines and eight equal rectangles on your paper.
Step 7: Fold your paper in half (side to side) and cut from the folded edge towards the outer edge for the width of the first rectangle only.
This will create an opening at the center of your paper as shown in the Step 8 photo.
Step 8: Fold your paper in half on the fold line and push inward, creating your zine. Press your fingers along the edges to flatten where pages are layered together. (see video below.)
Step 9: Label your zine using pencil. This isn’t not a necessary step but will be helpful as you illustrate your zine.
5) Begin Illustrating
Now that you’ve got your pages labeled and your zine folded, you can begin creating illustrations. Choose what your zine’s message will be, and begin adding text and images that coordinate with and communicate your message.
If you’re finding it difficult to get started, here are a few tips:
- Do a brain dump before illustrating your zine. Grab a piece of paper and write down or doodle anything that comes to mind.
- Try folding your zine before illustrating. Just be sure to layer a piece of paper behind each page as you draw, to avoid ink from leaking onto other pages.
- Visualize yourself as the reader. If you’re reading the zine, what information would you like to know? What could be included to add to the reader’s experience?
How to share your zine
Here are some great ways to share zines…
- Pen Pals
- Event Info
- Fundraiser Info
- Create a comic
- Cheer up a friend
- Cause Awareness
Tag me so I can see
Once you’ve completed your zine, be sure to share it with the world. If you decide to share your zine on social media, tag me so I can see your epilepsy zines!! You can find me at
Instagram: @christallebodiford
Facebook: @christallebodifordart


Leave a Reply